Brew Methods: AeroPress Coffee
In our first deep dive into coffee brewing methods, we’re exploring the AeroPress. This flexible, compact coffee brewing device is perfect for both home and travel.
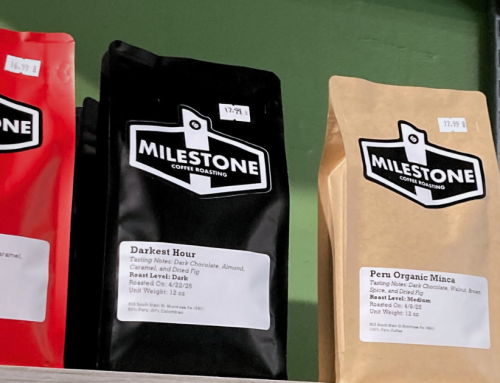
At Genuine Origin, we’re big fans of using the AeroPress for our daily filter coffee. Its versatility, ease of use, and accessible price point make it a standout choice. If you haven’t tried brewing with an AeroPress yet, here are a few reasons why it’s an essential tool for any coffee enthusiast.

Aeropress and accessories set up – by Bogdan Sonjachnyj
What is an AeroPress?
The AeroPress is a manual coffee brewing device. It uses air pressure to push water through coffee grounds, resulting in a smooth and rich brew. The device consists of a cylindrical chamber, a plunger, and a filter cap that holds paper or metal filters. Compact, portable, and easy to use, the AeroPress can brew everything from espresso-like drinks to full-bodied filter coffee.
This unique brewing device has a quirky origin story. Invented by Alan Adler, a prolific engineer known for creating the Aerobie™ flying ring frisbee, the AeroPress was first introduced in 2005 after Adler experimented with over 30 prototypes. His goal was to create a home coffee maker that could brew a single cup of coffee without sacrificing quality. While Adler is also known for his contributions to aerodynamics and military technology, the AeroPress stands out as one of his most famous inventions, becoming a beloved tool in the coffee world.

How to use an Aeropress for espresso – Jakub Kapusnak – Foodiesfeed
How to use an AeroPress
To brew coffee using the traditional AeroPress method:
- Insert a paper or metal filter into the filter cap and attach it to the extraction chamber.
- Using the included scoop, add one heaping scoop of medium-fine ground coffee to the chamber and set it on a mug or vessel.
- Pour hot water (around 185°F) into the chamber until it reaches the “4” mark.
- Stir the grounds with the included stirrer and insert the plunger into the top of the chamber to create a vacuum.
- After 30 seconds of extraction, slowly press the plunger down to complete the brew.
Pro tip: For an easy cleanup, remove the filter cap and press the plunger fully to eject the coffee grounds into a trash bin.

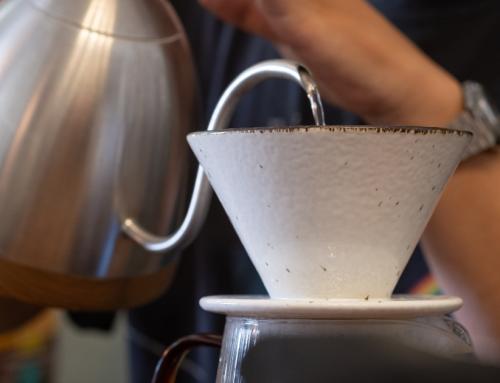
Pouring water into an Aeropress – OlegKov – Getty Images
Why is the AeroPress so good?
The AeroPress is beloved for its compact size, durability, and versatility. Its unique 3-in-1 brewing system combines elements of espresso, pour-over, and French press methods into one lightweight device. You can brew various types of coffee depending on your recipe, making it a perfect tool for beginners and seasoned enthusiasts alike.
Steven Edwards, part of our sales team at Genuine Origin, shares his love for the AeroPress. “I will always have a soft spot for the AeroPress. When I was getting into specialty coffee, I received an AeroPress as a gift from a friend who considered me a ‘coffee snob.’ As someone who was coffee curious, but had no idea what I was doing, this was a giant leap in the right direction for making the perfect coffee every time.
Aside from having a cool story about its creation, the AeroPress is great for consistency if you don’t have a scale or grinder at home. Anyone can just scoop their preferred amount of coffee into the chamber, fill it up, and brew for as long as they’d like. It looks like a fun science experiment to onlookers and can be packed easily for travel – which I still do to this day. The AeroPress is a fun, nearly unbreakable, compact, versatile vessel for beginners and industry experts alike.”
AeroPress vs. French Press
The AeroPress and French press are both immersion-style coffee brewers involving plungers and chambers. The main benefits of a French press are that it’s usually much bigger than an AeroPress, allowing you to make multiple cups of coffee at once, as well as having a heavier mouth feel that comes from using a metal filter.
However, the AeroPress gives you more flexibility over how you brew. It includes elements like extraction pressure or filter material. A paper microfiber filter will give you a cleaner cup profile and removes any grit or fines from the final cup. An AeroPress is also more durable and convenient. It’s made from plastic instead of glass or metal like most French presses. The AeroPress is also easier to clean! It doesn’t involve rinsing coffee grounds from the chamber into a sink which could potentially clog or break down pipes.

Plunging an Aeropress at a coffee bar – Bogdan Sonjachnyj `
AeroPress Original vs. AeroPress Clear vs. AeroPress Go
The AeroPress Original, AeroPress Clear, and AeroPress Go all share the same core brewing principles but differ in design, materials, and portability:
The AeroPress Original is made from durable, opaque plastic and makes 1-3 cups per brew. It comes with a stirring paddle, funnel, filter holder, and scoop. Ideal for home brewing.
The AeroPress Clear is similar to the Original in function, but is made with transparent, BPA-free material and comes in different colors. It provides more visibility during brewing and is more aesthetically pleasing, but otherwise mirrors the functionality of the original. A sleek design upgrade.
The AeroPress Go is a travel-friendly version that’s more compact, brewing 1-2 cups into an included travel cup that doubles as a carrying case. It retains all the functionality of the original but is more focused on portability and convenience for travelers or campers. Best for being on-the-go without sacrificing quality.
Inverted vs. Upright AeroPress Brewing
The traditional brewing method for the AeroPress is keeping the chamber upright. However, many coffee enthusiasts like to invert the chamber, flipping it upside down so that the plunger is inserted first, and the open end faces up. Coffee and water are added, and after steeping, the filter cap is attached and the AeroPress is flipped back upright for plunging onto a mug.
While the upright method is simpler, cleaner, and produces a lighter brew, the inverted method offers more control over the steeping time because no water drips through the filter until the AeroPress is flipped back over. It results in a bolder, fuller-bodied cup due to the extended steeping but can be tricky to execute, particularly when it’s time to flip over a chamber full of hot water and coffee.

Coffee being pressed through an Aeropress – Rabizo Getty Images
The best AeroPress brewing recipes
You can get very creative with AeroPress brewing recipes, including making filter coffees with beans from your favorite origin, fresh cold brew or flash brewed iced coffee.
It’s hard to pin down the absolute best AeroPress recipe, but in 2008, some AeroPress fans set out to do exactly that with the birth of the World AeroPress Championship. The competitions start out at the regional and national level with over 175 qualifying events around the world that take place in over 60 countries. Each country sends their best representative to battle it out in a multi-round elimination style tournament that’s all about good vibes and great coffee. At its core, the WAC is one huge party.
(This year in 2024, the World AeroPress Championship takes place in Lisbon, Portugal, and for the first time ever, will feature a Roasters Village where guests can taste coffee from some of the best roasters in Europe.)
Of course, the winning recipes from past WAC champions are some of the best AeroPress brewing recipes out here. Here are a couple to get you started:
Recipe #1 2023 WAC Champion Tay Wipasutt from Thailand
Brewer Position: Inverted
Dose: 18g total; 16g in step 1 and 2g in step 3
Grind: 1ZPresso ZP6, 65 clicks
Water: Perfect Coffee Water @ 81.5% strength, 89°C
Filter: 1 Paper Filter, Rinsed
Coffee: Washed Kenya coffee
Method:
- Put 16g coffee into the AeroPress and pour hot water for 100g
- Use 1 side of a chopstick and stir for 5 seconds at 0:30
- Put in another 2g of coffee at 0:45
- Stir for another 5 seconds at 0:55
- Press down the AeroPress to bring the plunger up and remove any excess air. Close the cap
- Flip carefully and press down at 1:35 for about 30 seconds. Your yield should be around 75g +/-
- Bypass with room temperature water to 115g
- Bypass with hot water to 155g +/-
- Taste and serve.
Recipe #2 2022 WAC Champion Jibbi Little from Australia
Brewer Position: Inverted
Filter: 1 AeroPress Original, Rinsed
Dose: 18.0
Water: Perfect Coffee Water, 90°C, 150ml
Grinder: Two Grinders. Timemore at a very coarse grinder, followed by a Kinu grinder at setting 4. Sift the fines out (100-200 microns).
Time: 2:10
Coffee: Natural Colombia coffee
Method:
- Pour coffee into chamber
- Pour 94ml of water and stir 35 times gently
- At 1:20 screw on cap and press out remaining air
- At 1:30 flip and press for 30 seconds from 1:40 – 2:10
- You will have about 58-64g of concentrate
- Bypass 90C water to 150g
- Aim for TDS of 1.3 – 1.35 (it is amazing at this strength)
- Serve
Optional: use extract chilled ice balls (3 at the bottom and 1 on top. total of 4). It will give you a smooth mouthfeel.
Where to buy an AeroPress
It’s easy to buy an AeroPress directly from their website, but many local cafes, roasteries, and resellers near you will also stock up on these handy brewing devices in-store. They’re also available on Amazon and even at Target or Walmart. They’re that popular.
The AeroPress has earned its reputation as one of the most versatile, portable, and user-friendly coffee brewing devices on the market. Whether you’re a beginner looking for a no-fuss way to make great coffee or a seasoned enthusiast wanting to experiment with different brewing styles, it’s a must-have tool for any coffee lover.